Android Application Building and Publishing
In this section, it will be shown how to generate an Android project to build the app, display it in devices and publish it in Google Play.
Contents
- Requirements
- Downloading and Running the App
- Setting Up Icons and Images
- Creating Icons and Images for the Application
- Changing the App Icon
- Publishing the App in Google Play
Requirements
To be able to download and test the project on a device, it is compulsory that the Android Studio tool is installed. Download Android Studio here.
Minimum requirements for Android Studio installation are the following:
Windows
- Windows 7/8/10 (32 o 64 bits).
- 2 GB RAM (8 GB RAM recommended).
- 2 GB free hard disk space (4 GB recommended).
- 1280 x 800 minimum screen resolution.
- Java 7/8.
- 64-bit Intel processor (emulator).
Mac
- Mac OS X 10.8.5 or later.
- 2 GB RAM (8 GB RAM recommended).
- 2 GB free hard disk space (4 GB recommended).
- 1280 x 800 minimum screen resolution.
- Java 6.
Linux
- GNOME o KDE Desktop.
- Ubuntu
- 64 bits / 32 bits.
- GNU C (glibc) 2.1 or later.
- 2 GB RAM (8 GB RAM recommended).
- 2 GB free hard disk space (4 GB recommended.).
- 1280 x 800 minimum screen resolution.
- Java 7/8.
- 64-bit Intel processor (emulator).
If any help is needed for installing Android Studio, check the tutorials for each operating system here.
Downloading and Running the App
Downloading the project
Once the app is configured and it has at least one published version as shown in the first part of this tutorial, head to the Build App section and download the Android project by clicking on DOWNLOAD ANDROID PROJECT. These steps can be followed in the video below:
Opening the Project
Head to the Downloads folder, find the file standalonesimpleapp-android.zip and unzip it. Then, open it with the Android Studio tool as shown below:

Running the App in Emulators
In order to test the app with the emulators, one of them must be configured in Android Studio. In case the emulator is not there yet, AVD Manager can be used by following the steps below:
- In Android Studio, select Tools > Android > AVD Manager, or click on the Administrador de AVD in the toolbar.
- Click on Create Virtual Device to create a new AVD.
- Select a hardware profile and click on Next (in case the hardware profile cannot be visualized, a new hardware profile can be created or imported).
- Select the system image for a particular API level and, then, click on Next.
The API level of the device is important as the app will not be able to execute in a system image with an API level below 21. This is a mat|r requirement.
- Change the AVD properties as necessary and, then, click on Finish.
- Start the emulator by double-clicking on AVD or just once on Run.
- Finally, after clicking on Run, the application will be executed in the simulator.
.gif)
Running the App in Physical Devices
In order to run and test the app in an Android device, the steps below must be followed. Remember that an Android 5.0 version or later is necessary. This is a mat|r requirement.
1) Enable USB debuggingmode in the phone. To do so, head to Settings > Developer options.
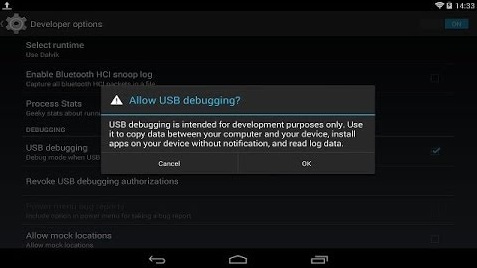
Note: in Android 4.2 and later versions, the Developer options is preset hidden. For it to be available, head to Settings > About phone and click on Build number seven times. When returning to the previous window, the Developer options will be available.
2) Connect the device to the computer where running Android Studio. It will appear an alert that allows the USB debugging in the device. Accept by clicking on ACEPTAR.
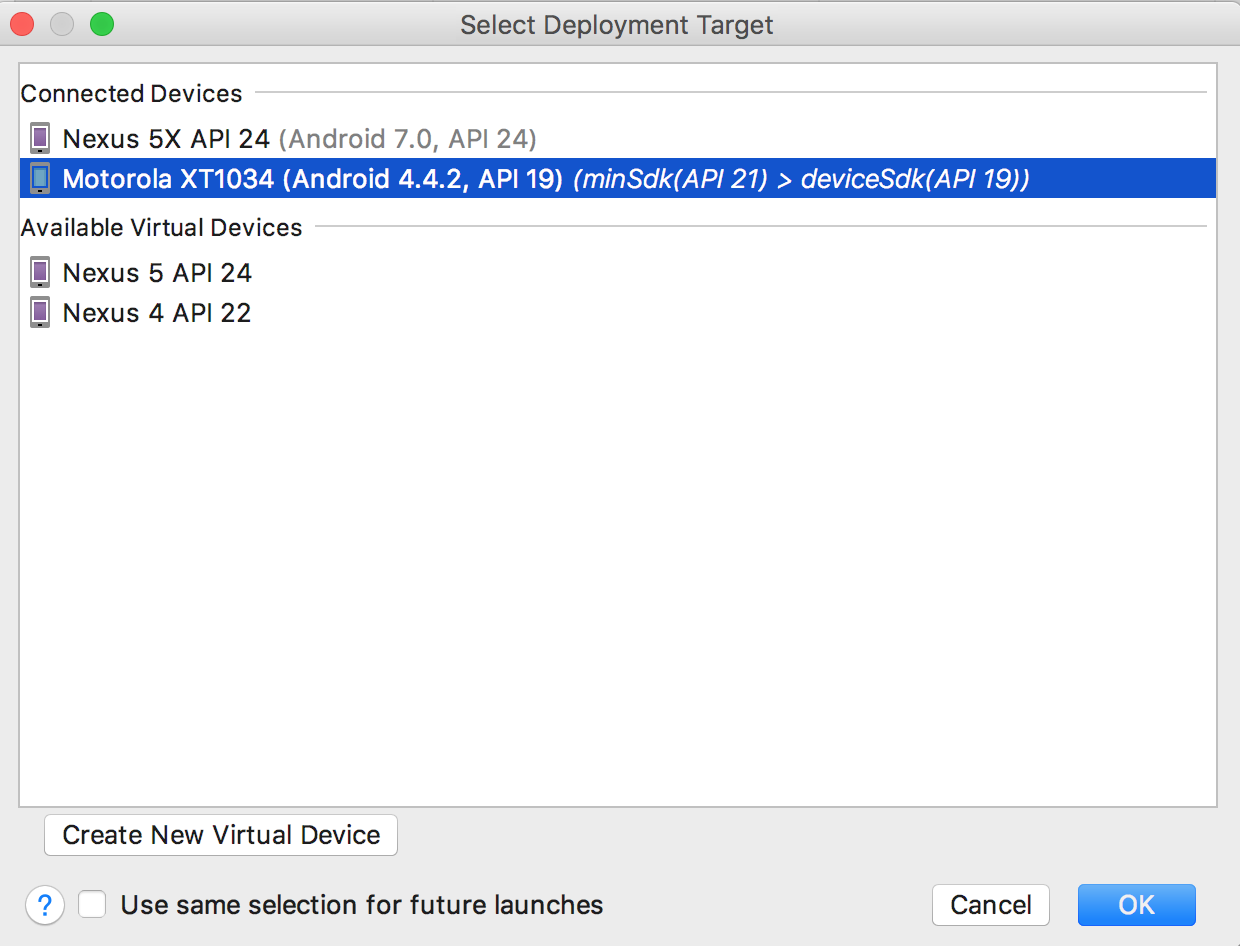
3) Click on Run matrtemplate.
4) Select the device and press OK. The app will be installed in the device.
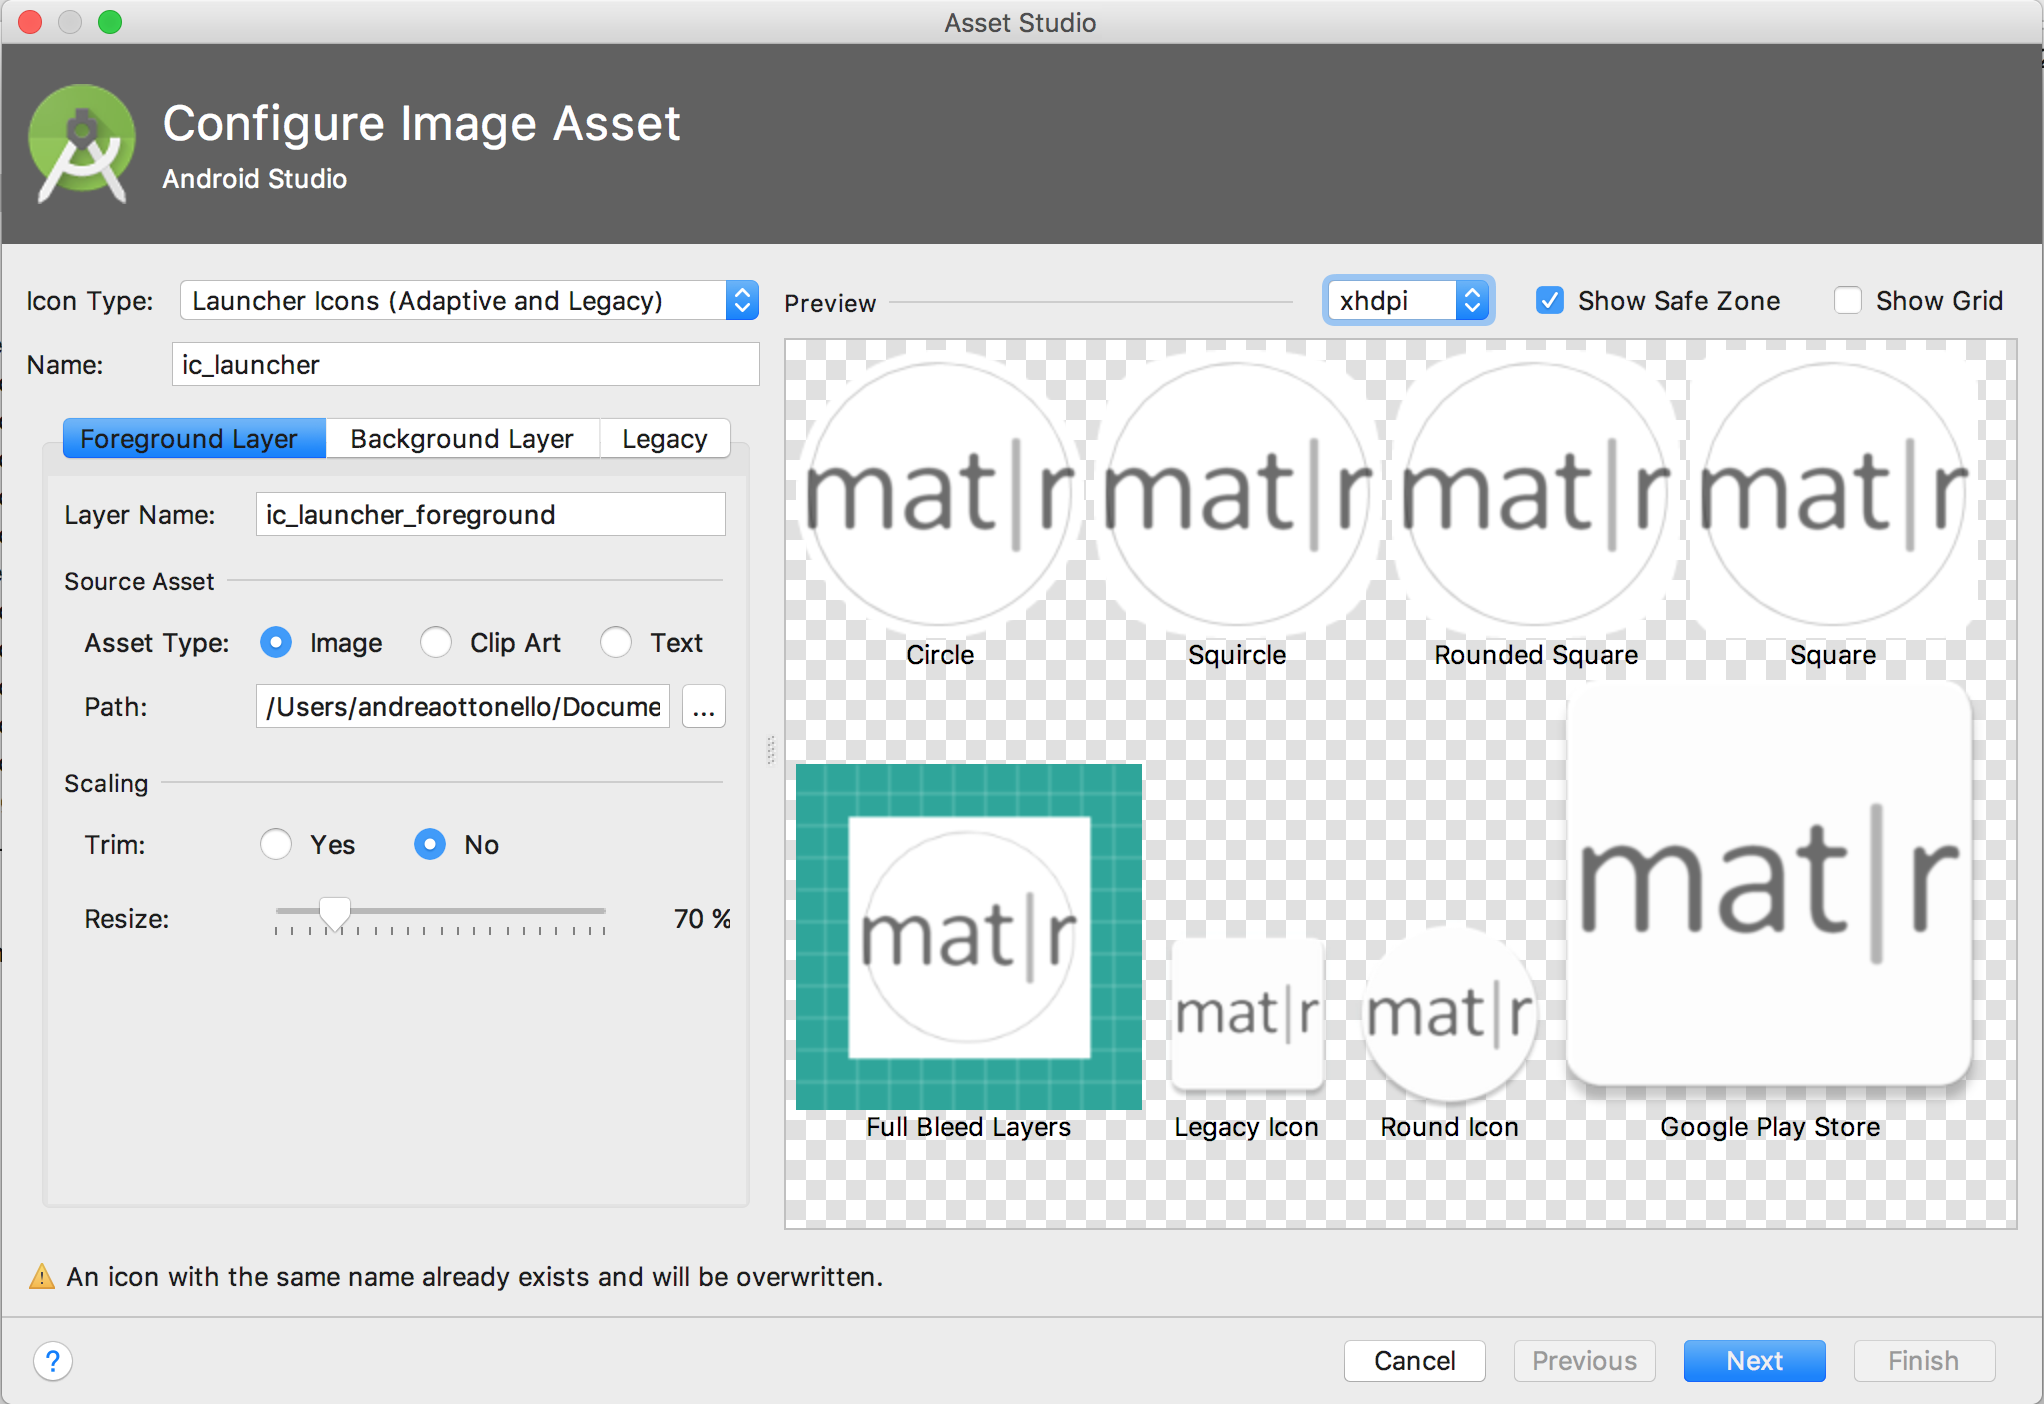
Setting Up Icons and Images
With Image Asset Studio different icons and images with various densities can be created. This resource also shows the exact location where these will be displayed. Tools for adjusting icons and images and adding background are included. Besides, the result can be visualized in a preview subpanel to make sure that the images and icons appear where needed. Thanks to these tools, the icons and images’ design and import processes can be optimized greatly.
Creating Icons and Images for the Application
- Select the Android view in the Project window.
- Select the res folder and, then, File > New > Image Asset.
- Alternately, right-click on the res folder and select New > Image Asset. Some other project views and folders have this element on their menus.
- Image Asset Studio will appear.
- To set up icons, select Asset Type > Clip Art
- To set up images, select Asset Type > Image
Changing the App Icon
In the previous section, it was explained how to set up icons and images. Now, it will be demonstrated how to change the app icon, i.e., the icon that will be visualized in the device. To do so, follow the steps below:
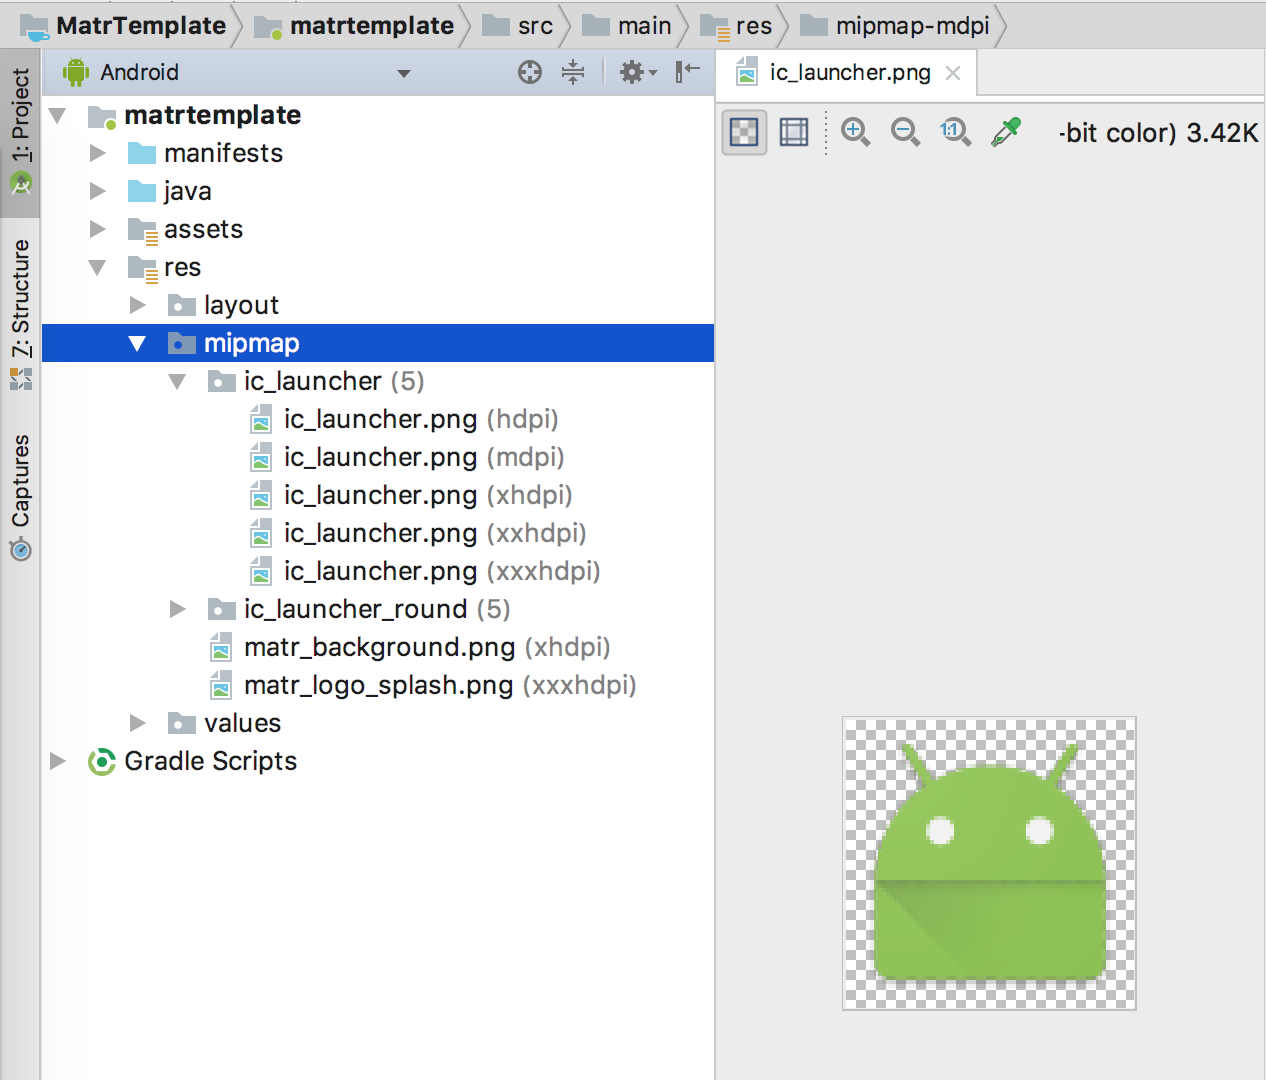
- Generate the icon as stated in the guide.
- Head to the project path MatrTemplate/matrtemplate/src/main/res/ and check that the icon files are there. The mipmap folders show the right naming convention.
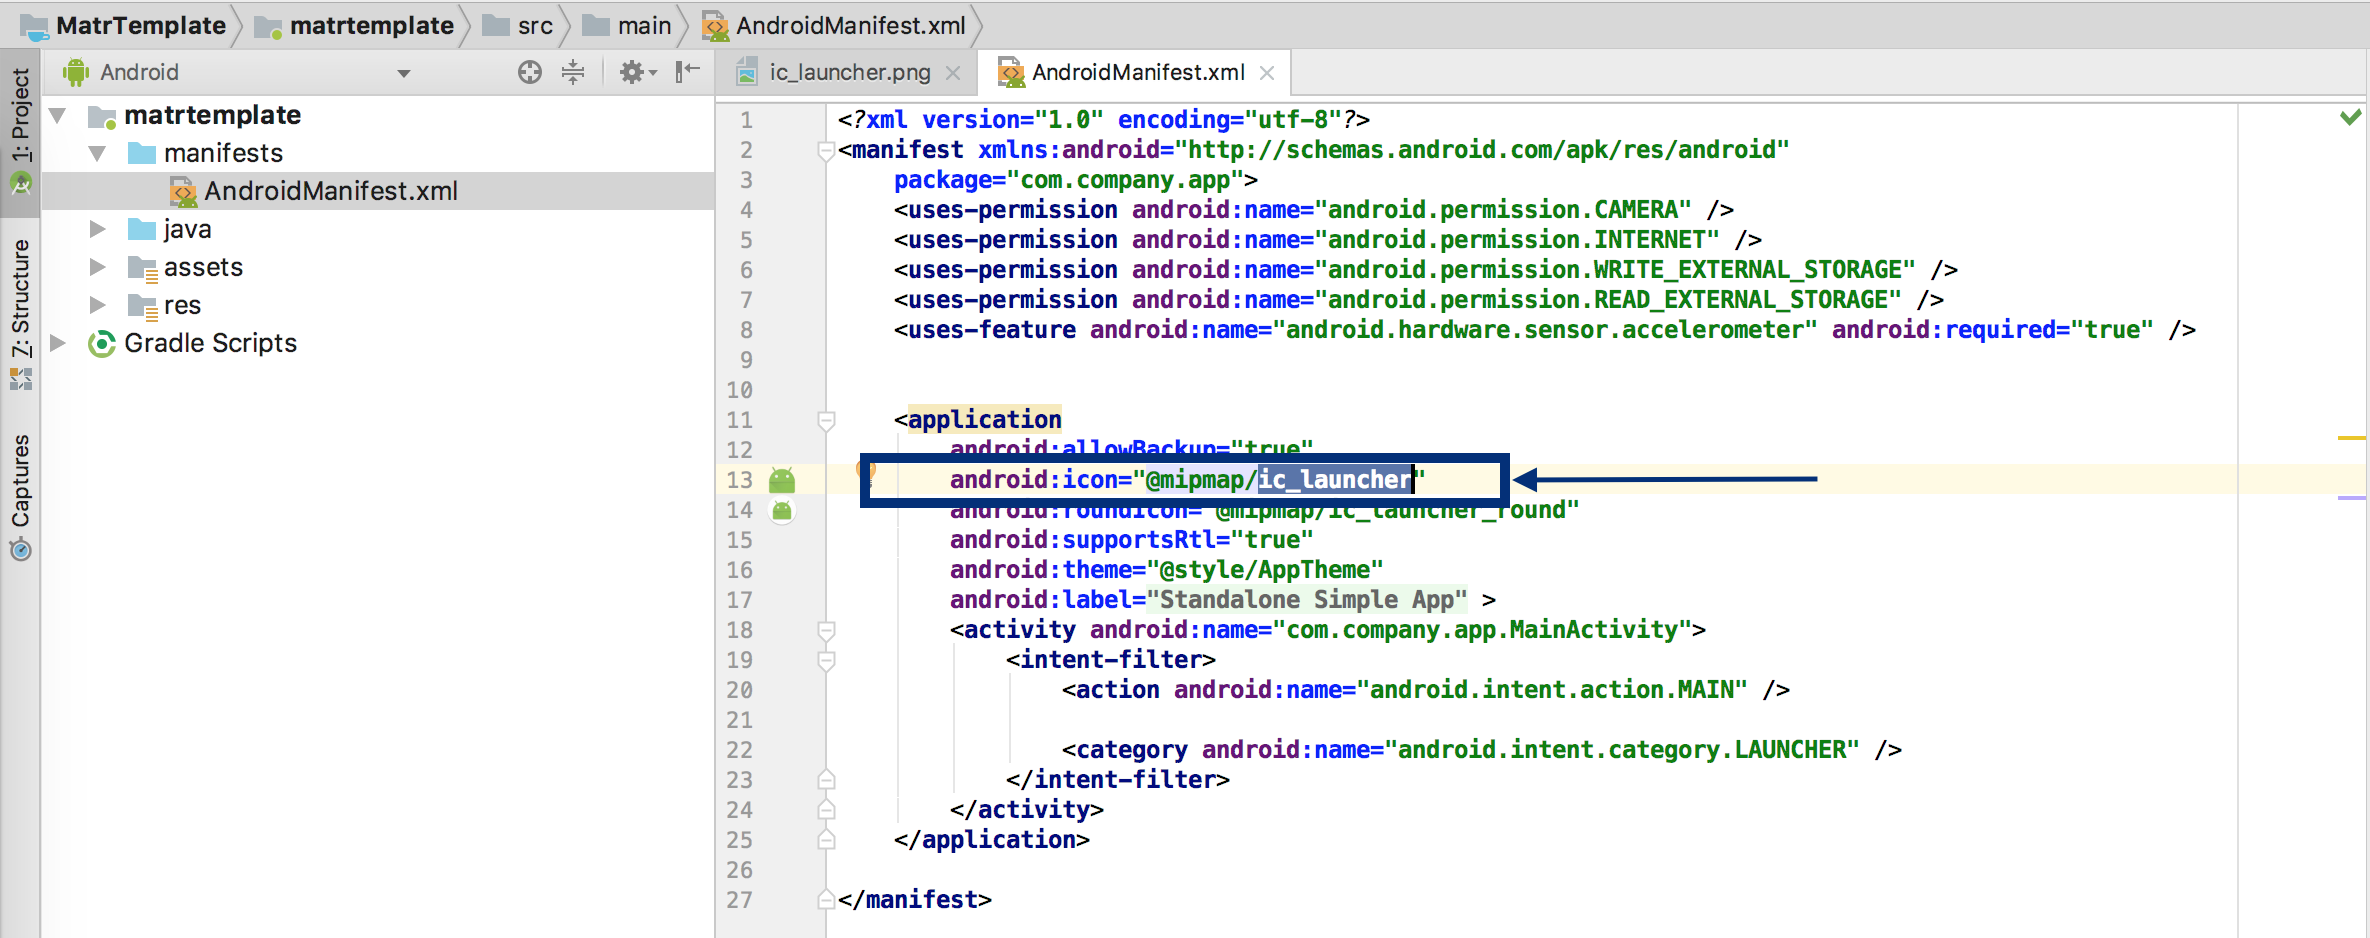
- Access the file AndroidManifest.xml and update the icon’s name with the one created.
Publishing the App in Google Play
In order to publish the app in Google Play application store, follow the steps below:
- Generate your apk and digitally sign it. In case this process is unknown, read this guide. How to sign my apk?
- Access your development account. If you still do not have one, head to Create a Google Play development account..
- Once registered and having a Google Play developer account, you will be able to create apps with Play Console. How to upload my app.
- Finally, to publish your app, head to How to publish my app.